Beginner's Blender setup for 3D print modeling
Also available in Português.
7 min
One of the distractions I decided to get since the pandemic started was a 3D printer. I was always curious about them but never got a strong reason to buy until I had to find ways to get my son and me entertained at home. And I must say, 3D printers are fun and opens a world of possibilities of toys, tools, home appliances and many more.
In the first weeks with a 3D printer you usually rely on pre-designed models in the several 3D model repositories available for free, but it's inevitable that at some point you will want to design your own models. And among the several tools available, I chose Blender to learn and use.
Blender is an ultra complete, professional, free and open source 3D creation suite. I personally like the combo made by free software, big community support and a super professional tool. In case I get myself too involved at least I don't need to move to a new tool, because Blender has no limits!
I'll show you how to setup a boilerplate Blender file that has everything you need to start 3D modeling and avoid the common pitfalls that can affect your print later. This article won't teach you how to model or how to get your model in the printer, but I'll give some tips and directions on how to get there.
Learning Blender
First you need to install it: www.blender.org/download/. For this post I'm using Blender 2.90.1, but even if you have a newer version you should be able to follow it.
Being the popular tool that Blender is, there's plenty of online resources to learn it. I'll save your time and recommend the one I watched:

Ram Singh is the author of this video series where he teaches Blender in 7 days. You can easily see how dexterous he is in the tool after a few minutes watching it and I personally liked the pace of the course which is not slow and you can learn a lot in a short period of time. For 3D printing you will need at least to watch the series until day 3, covering the basics, editing objects and modifiers.
3D Printing setup
From now on, if you wish, you can open Blender and follow along the setup of this boilerplate file. Feel free to save the file to use as a template in the future. You can also override the default startup file with File > Defaults > Save Startup File.
1. Cleaning
When you start Blender, you get the following screen:
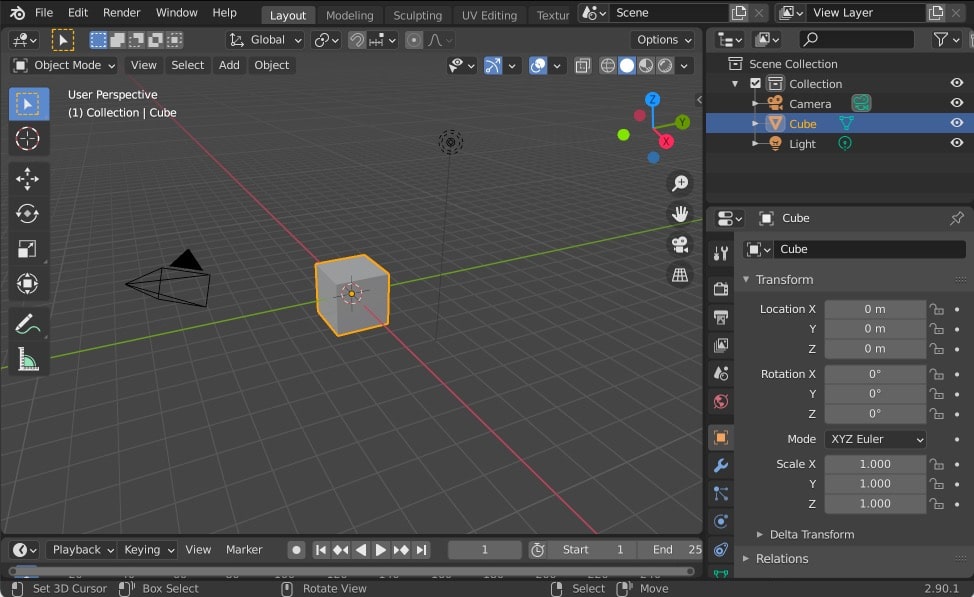
The first step is to get rid of elements we don't need in 3D printing, which are the camera and light. To delete them, just select them in the right sidebar, the one with the Scene Collection, and press X while selecting camera and light or use the context menu.
2. What you see should be what you will get
3D printers are precise instruments and knowing the exact size of objects when modeling is crucial to have a printed object in the dimensions you planned. With an object selected in Blender, if you press N you can see the dimensions of the object, presented in the image below.

The cube in the image has an edge of 2 meters and the grid where the cube lies has 1 meter of distance between each line. While I wished we had a printer big enough to print objects like that, we need to scale down the units to be able to handle smaller objects and we also need a grid compatible with our printer capable volume.
Units
To have better units to work on your model, open the Scene window as the image shows below and change the following settings:
- Unit scale: from
1to0.001. It defines the scale factor to use when converting between internal units and values displayed in the user interface. - Length: from
meterstomillimeters
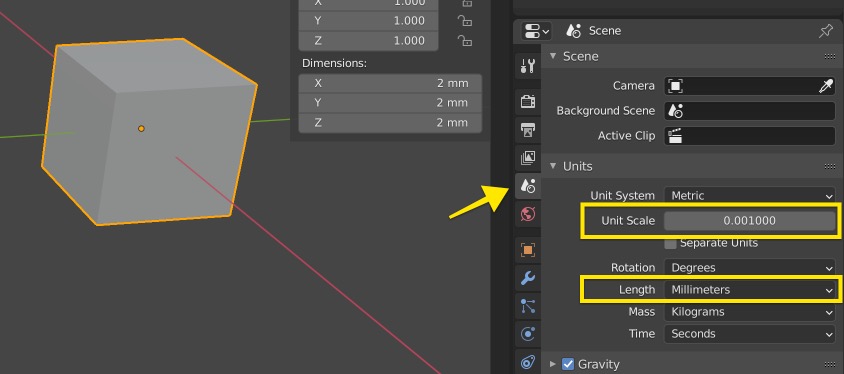
If you see the object dimensions above, you will realize that now it shows as having an edge of 2 millimeters instead of 2 meters.
Grid
The grid is still showing 1 meter between each line. Having a properly sized grid is very important because it helps us to quickly check sizes when modeling and also to align different objects. Ideally the grid should have a 1 millimeter granularity.
To set a new grid size you click in the Overlays option as the image shows below and change the scale of the grid to 0.001.
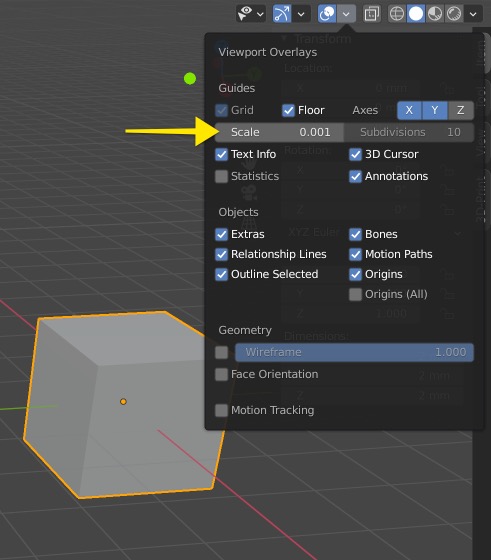
Now the grid in the image is showing a 1 millimeter granularity.
Working Area
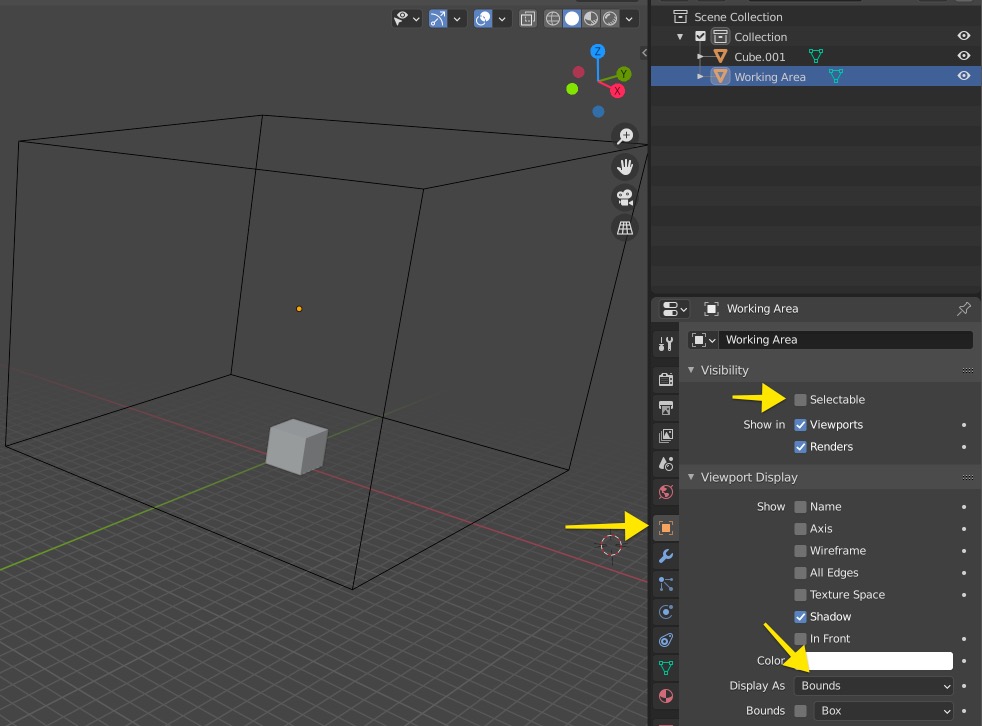
Next step is to make visible the boundaries you should be constrained so the object fits in your 3D printer range. This step is optional because usually you can change the object scale in the Slicer software (the tool that converts the 3D object in instructions for your printer), but if you want to have that control, do the following:
- Select the cube with mouse
right-buttonclick - Set its dimensions to the dimensions of your 3D printer (press
Nto see the Item tab) - Set its location to
x = 0,y = 0andz = height/2(z is actually in the center of mass, not in the base, that's why it's not zero) - Click on the Object properties tab as indicated in the image below
- In the "Visibility" untick
Selectable - In the "Viewport Display" tab, choose "Display As" to
Bounds
Then you should see the Working Area as the image below. I renamed the object name to "Working Area" so you don't mix with other objects in the collection.
3. Getting the details right
Edge measurement
It's common to have parts of your model that you need to ensure precise measurements, such as holes, gaps, parts that will be attached to others, like a screw, for example. To help you to know exact edge measurements, Blender has an option in the Viewport Overlay, as shown below:
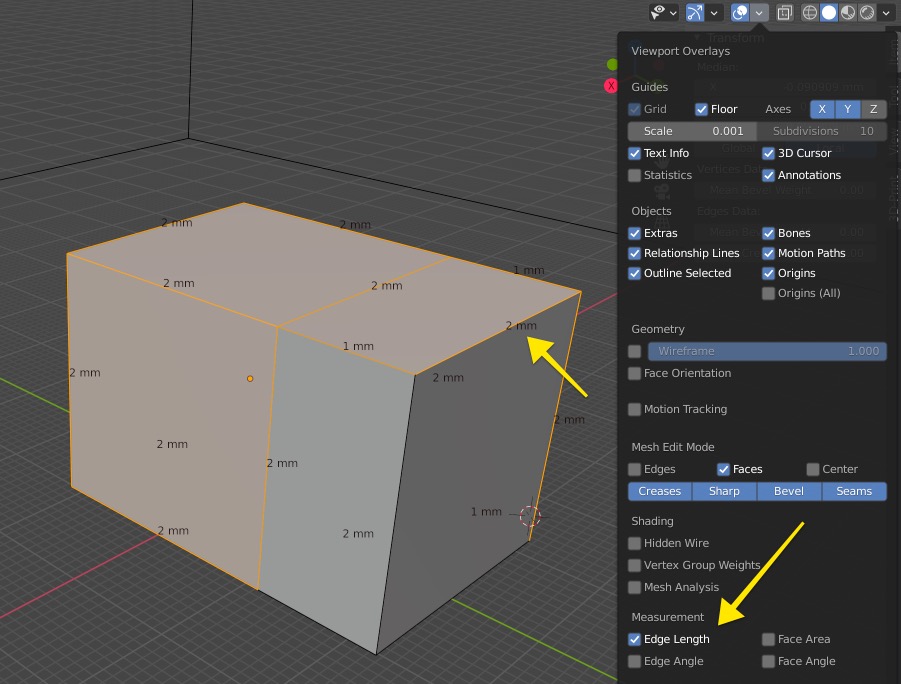
Once enabled, it will show the measurement of the selected edges. There's an important catch, if you scale an object, this measurement might be "wrong" because it only gets updated if you Apply the scale transformation by selecting the object and pressing CMD + A or Ctrl + A and choosing "Scale" transform to be applied.
3D print add-on
Finally, there's an essential Blender add-on that helps us to check if the object we will be exporting is "healthy", i.e. doesn't have any problem like being non-manifold, super thin surfaces, too sharp edges or face intersections. The great thing about this add-on is that it can fix your model with a single click in most of the cases.
To enable it go to Edit > Preferences, then select Add-ons, search for "3D-print" and enable the add-on. You now have a side tab when you press N named "3D-Print". Then with an object selected, try to click the "Check All" button to see the results.
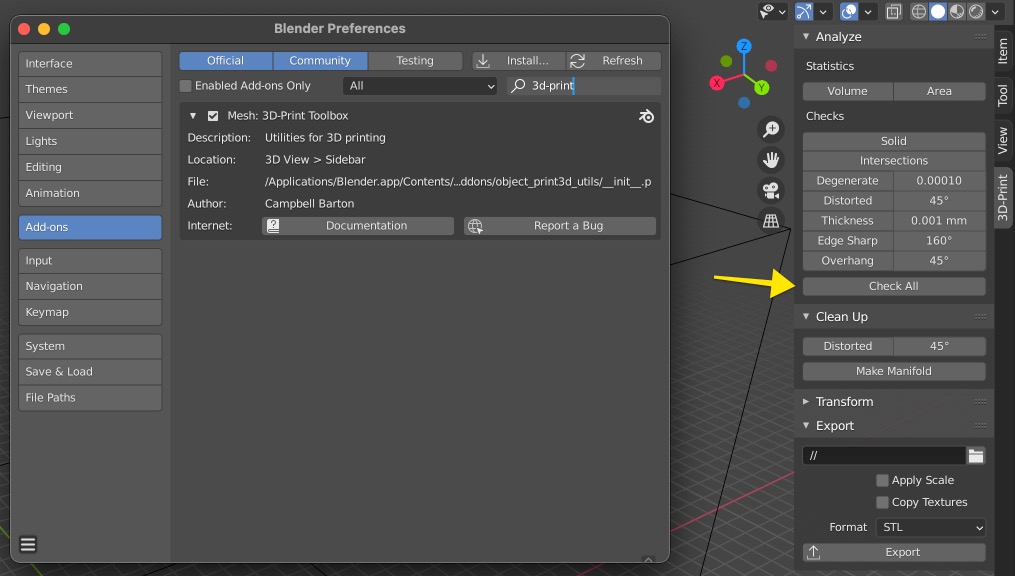
Instead of explaining the details of this add-on, I recommend you to explore the features with a cube object or try to "break" your object to see how the add-on reports the problems.
Once your object passes all checks, you can use the Export button to save it in the desired format for processing in the Slicer software.
Now you build
That's it! With these steps you will be able to start building your object ensuring that all edges are in the size you want and that your model is printable without issues. We just scratched the surface of Blender and there's still a lot to learn, but I can attest that this setup helped me a lot since I started to play with 3D modeling.
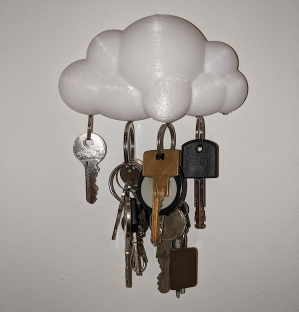
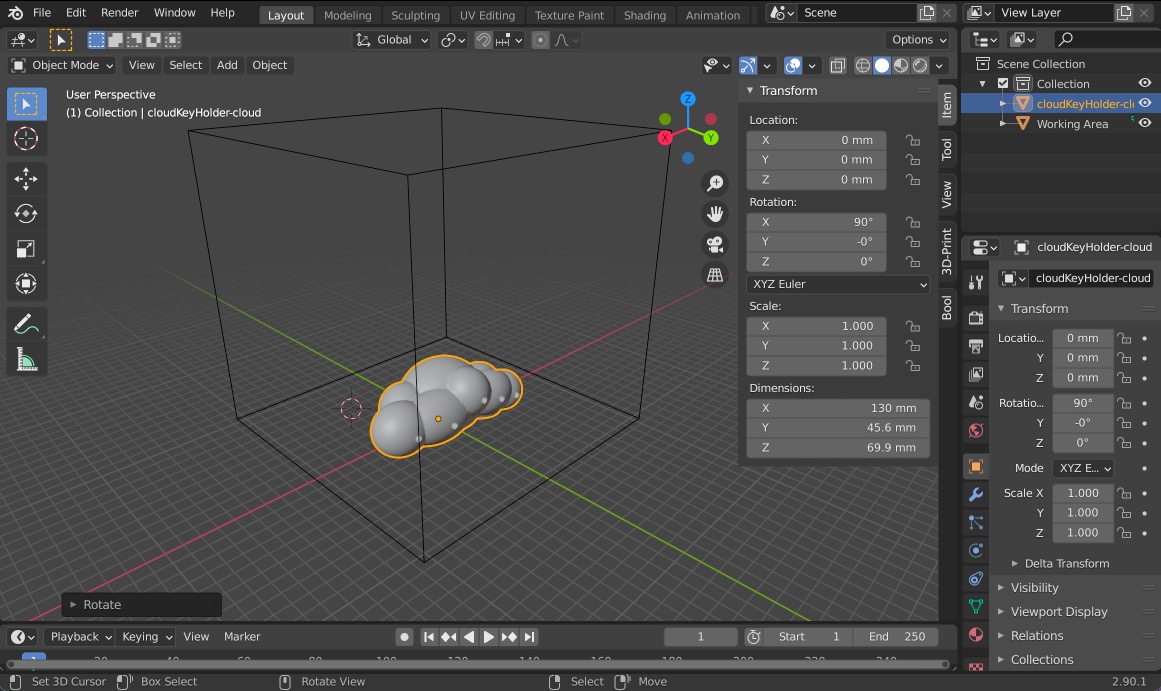
Here's a magnetic key holder I designed and printed to use at home:
As a suggestion for further reading, these topics might interest you and can help to avoid other pitfalls:
- Learn how to use the Boolean modifier or use BoolTool add-on.
- Learn how to use Mesh Analysis.